






Musty Washing Machine? Clean the Seal, Drawer, and Drum Safely
A musty washing machine usually needs attention in three places: the door seal, detergent drawer, and the internal wash system. An empty cleaning cycle can help with deposits inside the machine, but it may leave grime in the seal folds and dispenser housing untouched. Clean those accessible areas first, then run the maintenance cycle specified for your model.
Before starting, check whether the smell comes from the appliance itself or from a nearby drain. Slime around the seal, a sour-smelling drawer, and odor that becomes stronger when the door opens point toward buildup inside the washer. Water left in the drum, sewage-like smells, or repeated drainage errors call for a different approach: cleaning alone may not resolve them.
Choose the cleaner before you start
Read the appliance’s care instructions, particularly the sections covering the door gasket, dispenser, and drum-clean program. Cleaner compatibility varies between machines. A product suitable for a stainless steel drum may still be unsuitable for rubber parts, coatings, or dispenser components.
Use one approved cleaning product for the maintenance cycle, at the specified dose and in the specified compartment. Do not combine products or add extra detergent to strengthen the treatment. Excess detergent can leave more residue and create excessive foam.
- Never mix chlorine bleach with vinegar, descalers, toilet cleaners, or other acidic products. This can release toxic chlorine gas.
- Never mix chlorine bleach with ammonia or other cleaning products. Dangerous gases can form.
- Avoid improvised cleaner sequences. If another product has already been used, follow its rinsing instructions and the appliance guidance before introducing anything else.
Vinegar and baking soda are frequently suggested as household remedies, but neither is a universal washer-cleaning solution. Combining them neutralizes much of their cleaning action, while repeated acid exposure may conflict with the manufacturer’s material-care instructions. A compatible washer cleaner provides a clearer basis for dosing and use.
For manual cleaning, switch the machine off and unplug it with dry hands. Let hot surfaces cool, ventilate the room, and wear any gloves or eye protection required by the cleaner’s label. Keep water away from plugs, controls, and electrical openings.
Start with the seal and drawer, where residue collects
Inspect the door seal before applying cleaner
On a front-loading washer, gently pull back the accessible folds of the rubber seal. Look along the bottom edge for trapped lint, hair, small objects, standing water, and slippery deposits. Remove loose debris with a soft cloth. Check visible drainage openings without pushing tools into them or trying to detach the gasket.
For accessible dirt, use a soft cloth and the cleaning solution permitted by the manual. Apply it to the cloth rather than spraying heavily into the machine. Wipe through the folds gently, respecting any contact time specified for the product. Remove remaining cleaner as directed, then dry the folds thoroughly.
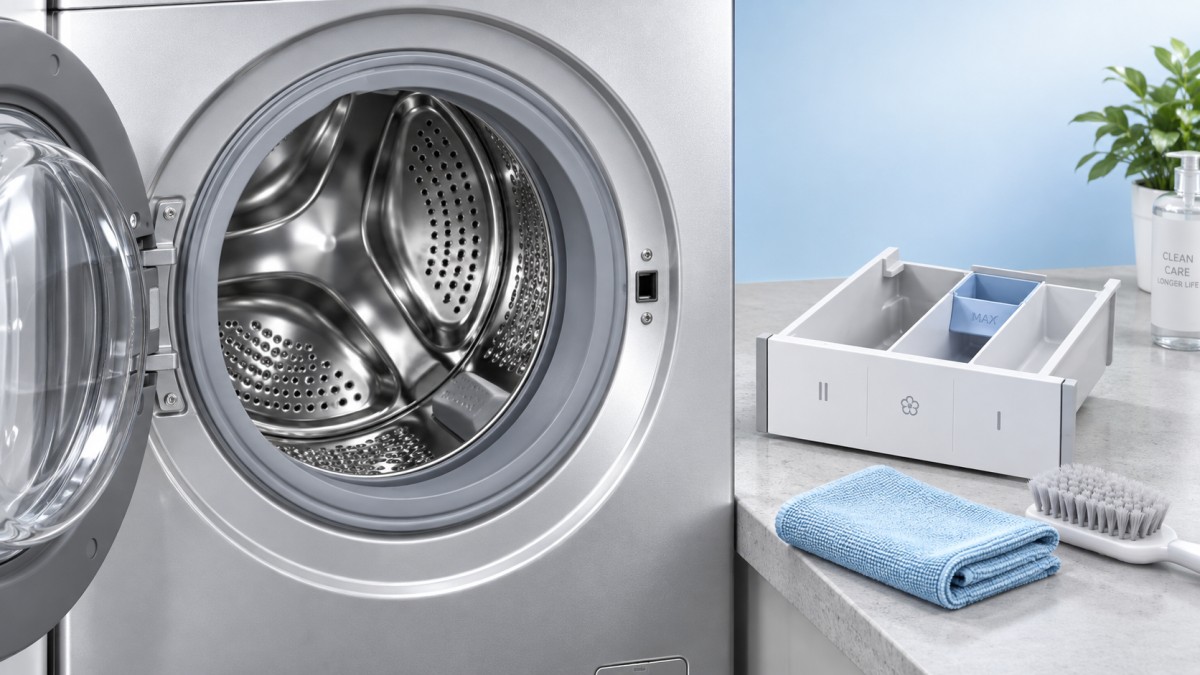
Avoid abrasive pads, sharp scrapers, and forceful stretching. Damage to the sealing surface can create a leak. If the gasket is torn, sticky, distorted, or continues to smell after appropriate cleaning, arrange an inspection rather than repeatedly applying stronger chemicals.
Dark marks do not always disappear when surface contamination has been removed. Persistent discoloration alone cannot tell you whether the seal is clean or needs replacement. Consider it alongside recurring odor, visible deposits, material condition, and the manufacturer’s advice.
Clean the dispenser and its housing
Remove the detergent drawer only as the manual describes; many have a release tab, but designs differ. Take out removable inserts, including the fabric-softener siphon cap where fitted. Rinse washable parts with warm water and use a soft brush to loosen residue from corners and channels.
Inspect the housing as well as the drawer. Deposits on its roof and around water-entry openings can remain even when the drawer looks clean. Wipe reachable surfaces with a damp cloth or a suitable soft brush, keeping water away from electrical components. Do not force a brush into inaccessible passages.
Rinse the parts and refit every insert correctly. A misplaced siphon component can prevent softener from dispensing properly. For automatic dosing systems, follow the dedicated reservoir-cleaning procedure; soaking or flushing an entire dosing assembly may damage components.
Run the correct empty cleaning cycle
Once the seal and dispenser are clean, reconnect the appliance and run its drum-clean, tub-clean, or maintenance program according to the manual. Leave the drum empty. Use the approved cleaner only where instructed, since some products belong directly in the drum while others go through a designated compartment.
If the machine has no dedicated cleaning program, use the procedure recommended for that model. Do not assume that the hottest available wash is suitable, or that a short hot cycle provides equivalent cleaning. Program duration, water level, and cleaner compatibility all affect the result.
Let the program finish. If the cleaner instructions require a separate rinse, complete it before washing clothes. Then inspect the drum and seal for loosened debris and wipe it away. Dry the accessible gasket folds again. A remaining fragrance from the cleaning product is not evidence that the original deposits have been removed.
Check the result once the washer has cooled and dried. If the smell improves but returns after a few loads, investigate detergent dosing, drainage, and drying habits before repeating chemical treatments. One cleaning cycle cannot correct a continuing source of moisture or residue.
When the smell points to a drainage or service problem
A pump filter can hold lint and small objects, but not every washer has a user-accessible filter. Open it only if the manual provides a procedure. Disconnect power, allow hot wash water to cool, and prepare for residual water using the specified draining method. Unscrewing a filter while the machine still contains water can cause a substantial spill.
If water repeatedly remains in the drum, check accessible areas for a kinked drain hose and compare the hose installation with the manual. Incorrect hose positioning can affect drainage. Persistent sewage-like odors may originate in the plumbing connection or drain trap and warrant a plumbing inspection.
Stop using the appliance and seek qualified service if there is a burning smell, electrical tripping, leakage, or damaged wiring. Recurring drainage errors and inaccessible contamination also deserve investigation. Repeated cleaning cycles are unlikely to solve a mechanical or installation fault.
Keep moisture and detergent residue from rebuilding
Remove laundry promptly after the cycle finishes. When safe, leave the door and dispenser slightly open so accessible surfaces can dry. In homes with children or pets, prevent access to the drum and follow the appliance’s safety instructions; an open door should never create an entrapment hazard.
Measure detergent using the product guidance for load size, soil level, and local water hardness. Use the detergent type specified for the washer. If the drawer or seal repeatedly feels slippery, review dosing and softener use. Adding more fragrance can mask an odor while leaving its cause in place.
Follow the manufacturer’s maintenance interval and adjust attention to actual conditions. A shared washer running frequent loads may need more regular seal wiping and dispenser inspection than a lightly used household machine. For shared facilities, assign responsibility for these tasks so they do not fall between operators.
After the next few washes, check whether the seal dries, the drawer rinses clear, and water drains fully. If mustiness returns despite correct dosing and completed maintenance, record when it appears and any accompanying drainage symptoms. Those details give a technician a more useful starting point than another round of cleaner.

Request A Quote?
Stay updated with our latest news. We promise not to spam!